Wednesday, April 09, 2008

Advanced Filtering in GMail

GMail provides filters and labels that are an effective way to organize and access the huge number of emails that we receive everyday.

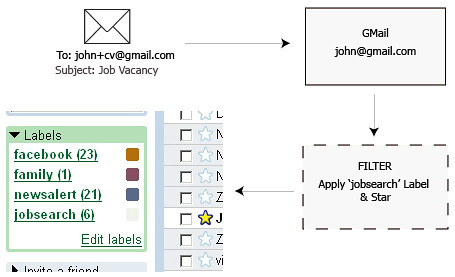
Recently I came across another feature of GMail that takes filtering of email to a whole new level. Every GMail address can be suffixed with a + followed by some text. E.g. john@gmail.com can be aliased as john+family@gmail.com, john+facebook@gmail.com or john+cv@gmail.com. All of the aliased mail gets sent to the primary account (john@gmail.com). This opens up whole new possibilities for powerful filtering.

Take for example the email address you provide on your CV or at a job search website. At times when you are actively looking for a new job, these emails are highly important. During other times, you might not want your Inbox to be cluttered with job notifications. This can be easily handled using GMail email aliases. Simply provide john+cv@gmail.com (or john+123@gmail.com if you wish to be discrete) when signing up at a job search website and on your CV. Next setup a GMail filter that looks for emails sent to john+cv@gmail.com and either flags them for your attention or at other times automatically deletes them!

Email rules and filters have existed for a long time but GMail aliases take this to a whole new level. The possibilities (of email suffixes) are indeed endless!
Thursday, March 20, 2008

Apache Ivy

Almost all Java projects, apart from the most trivial ones have dependencies. These dependencies could either be on other projects or third-party libraries. Managing these dependencies can be extremely time-consuming and distracting from the primary focus of the project. Apache Ivy is a tool for managing library dependencies. Ivy neatly fills the gap by providing an easily configurable and automated dependency management system. Further, Ivy supports transitive dependencies management. Hence all we need to do is declare our main dependencies and Ivy automatically fetches all the sub dependencies along with the main dependencies from a public location such as the Maven 2 repository.

Installation

Ivy is designed to work with Ant, wherein Ant is used to run the build tasks and Ivy is used to resolve, retrieve and manage the dependencies. The simplest way to get started is to copy the Ivy jar file to the Ant lib (ANT_HOME/lib) directory.

Configure ivy.xml

The ivy.xml configuration file is the main file that is used to describe our dependencies. Below is an example of a configuration file that states two main dependencies, Hibernate and the C3P0 library.
<ivy-module version="2.0">
    <info organisation="techvj" module="ivy-test" />
    <dependencies>
        <dependency org="org.hibernate" name="hibernate" rev="3.2.6.ga" />
        <dependency org="c3p0" name="c3p0" rev="0.9.1.2" />
    </dependencies>
</ivy-module>

Integrate With Ant

The final step is to integrate the Ivy dependency resolution process with our Ant build process. Following is an example of a build.xml file with the retrieve task defined:
<project xmlns:ivy="antlib:org.apache.ivy.ant" name="hello-ivy" default="retrieve">
    ...
    <target name="retrieve" description="">
        <ivy:retrieve />
    </target>
</project>

On running the above Ant build, Ivy retrieves the Hibernate and C3P0 libraries and all of their dependencies to the local machine. The retrieved libraries are stored in a cache and not downloaded again on successive invocations. Apache Ivy is a great tool in a Java developer's toolbox for managing library dependencies.

Wednesday, March 19, 2008

Wicked Shell for Eclipse

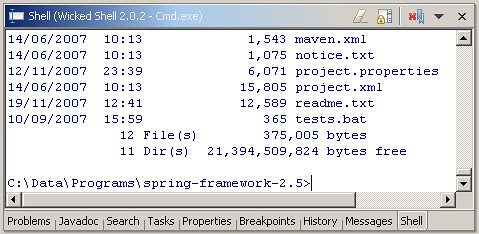
An Eclipse plug-in that I have begun to regularly use is Wicked Shell. Wicked Shell provides direct access to the operating system's shell (Cmd, Bash, SH etc.). In fact it is not an actual shell, it only acts as a window to the underlying shell using a SWT text widget to transfer commands and display output. The result is having an Eclipse view that behaves as a shell.

As with any Eclipse view that is regularly accessed, I would suggest setting up a shortcut key binding for Wicked Shell. On my installation I chose Alt+Shift+Q, S as the combination did not conflict with other pre-set bindings.